This one is for all of you squash lovers out there.
In this quintessential summer side dish, fresh basil, mint and balsamic vinegar play starring roles, from enhancing the squash to the finishing drizzle.
I honestly love what happens when you fry any summer squash because that flavor gets so concentrated and delicious. Want to really get those chips crispy? You’ve got to help the squash release all that moisture.
You can remove a ton of liquid before frying. Simply sprinkle the sliced pieces with salt and let them sit for a while.
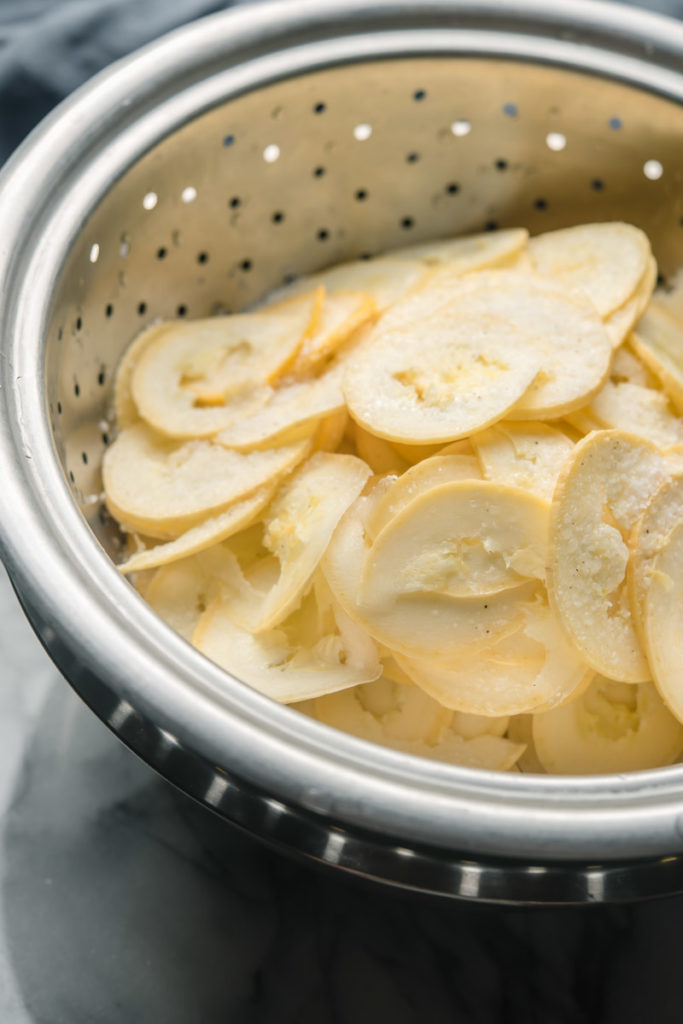
After 1 hour, the squash will be really soft and tender.
Here’s where I like to crack an egg on top and just rub that egg all over the squash. Next, I just work a handful at a time into a bowl of flour; you can use tapioca starch, arrowroot, even all-purpose flour.
After dredging, just be sure to give everything a good shaking off. You don’t want to get too much flour in the oil or it will give the food a burnt taste.
Ingredient Tip: Since these fried squash chips are best enjoyed fresh, look for small squash if feeding 2 people or large squash if feeding 4 to 6. Use zucchini, Mexican squash, or yellow squash inter-changeably.
Frying the Yellow Squash Chips
Light but sturdy olive oil is ideal for frying these crunchy little chips, and tart balsamic gives them a zippy kick before serving.
To be successful when frying anything, you really need to think about maintaining an even heat distribution; you don’t want rapid swings in temperature. This is why I love using a small Dutch oven for frying.
If using olive oil, I suggest medium to medium-high heat. You can use a thermometer to make sure the oil is around 365°F or you can actually just use a tester piece.
How to Use a Tester:
Lower 1 piece of yellow squash into the oil and watch what happens. You want the oil to bubble around the food immediately. This is especially true with high-moisture foods (such as squash).
Rather than rely on time, it’s more important to judge the doneness of the chips by the texture and color. As soon as the chips come out of the fry oil, they should be nice and crisp.
If they seem soft, you likely need to increase the temperature and fry longer.
More Summer Recipes
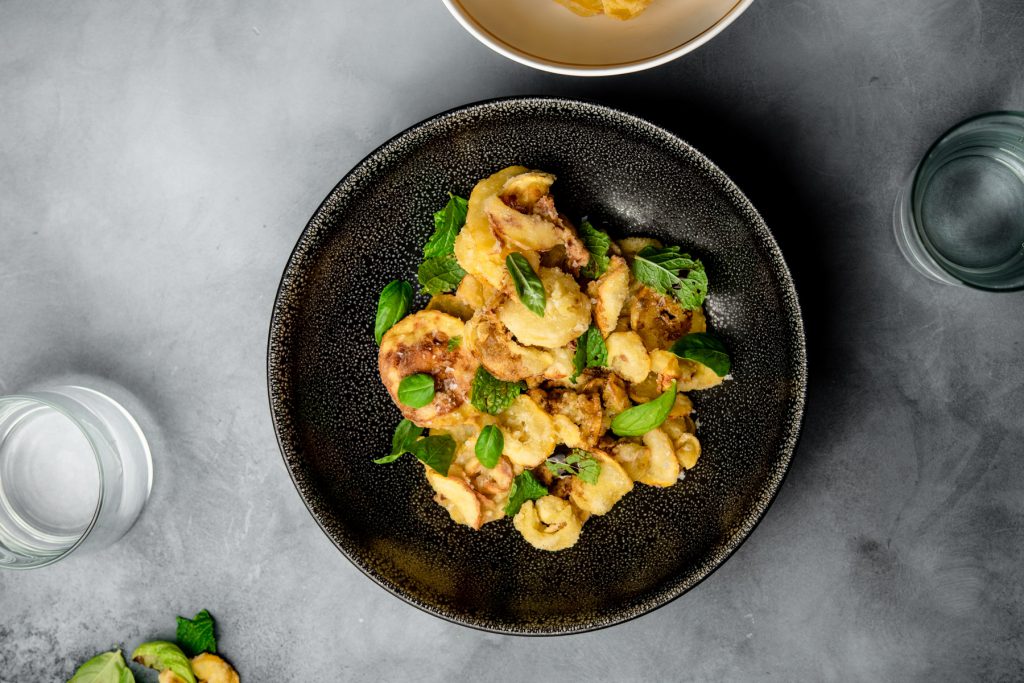
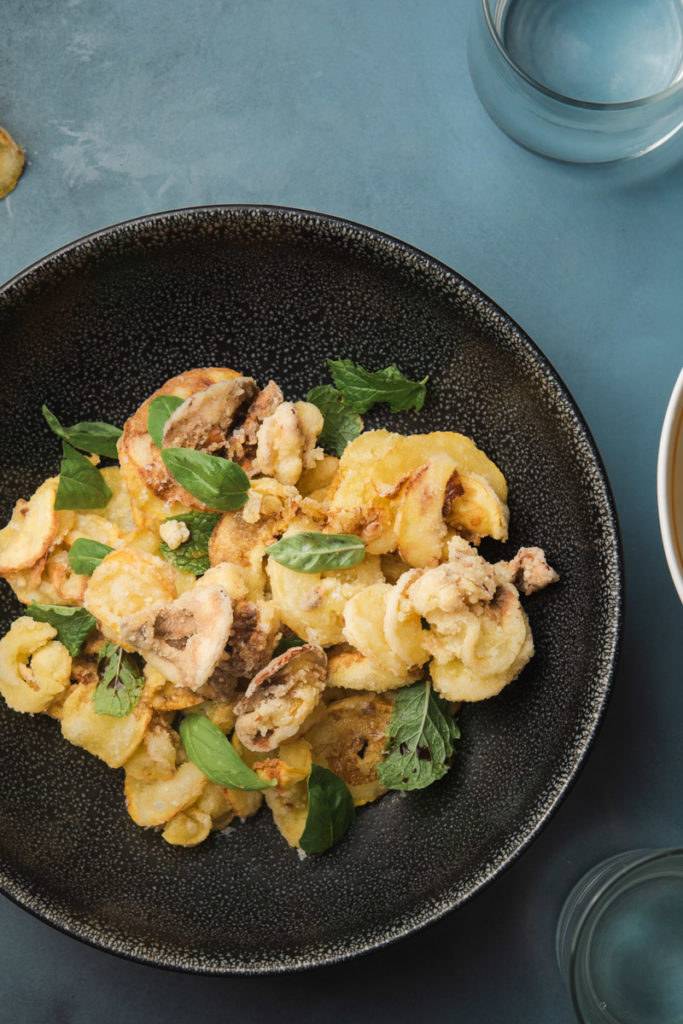
Just before serving, I love to generously sprinkle a flaky sea salt over the chips. This adds crunch and makes you want to keep eating the chips to search for the salty ones.
Oh, and don’t forget the fried garlic pieces!
Fried Yellow Squash Chips
Ingredients
- 2 small yellow squash zucchini or Mexican squash work, too
- 1 tbsp fine sea salt
- olive oil for frying
- 5 garlic cloves sliced thinly
- 1 large egg
- 1 cup tapioca, arrowroot, or all-purpose flour*
- 1 tbsp flaked sea salt
- 2 tbsp balsamic vinegar
- 1/4 cup mint leaves for garnish
- 1/4 cup small basil leaves for garnish
Instructions
- Slice the squash very thinly, about 1/8-inch using a mandolin. Put the sliced squash into a colander set over a large bowl. Toss the squash with sea salt and set aside for 1 hour. Use your hands to squeeze excess moisture out of the squash to remove any remaining liquid.
- Set a wire rack over a baking sheet. In a small Dutch oven or cast iron skillet, heat 1/2 inch of olive oil until shimmering over medium-high heat. Fry the garlic until light golden, about 1 minute. Transfer the garlic to a wire rack.
- Crack an egg over the squash and rub to coat. Add the flour to a large bowl and toss the squash, 1 handful at a time. Coat the chips evenly and use a slotted spider strainer to shake off excess. Fry in batches until the chips are very crispy and slightly brown, about 2 minutes per batch. Drain on the wire rack. Season with flaky sea salt and serve with fried garlic and balsamic vinegar. Add the basil and mint and serve.
Notes
Nutrition
Some of the links on this page are affiliate links, which may pay me a small commission for my referral at no extra cost to you!